
Boost Charge makes high output current available to boost charge an in-vehicle battery and assist in starting the engine.
Press STOP to abort at any time.
IMPORTANT: Before starting Boost Charge, verify that all vehicle loads are off and the key is not in the ignition.
At any time during the test, tap ![]() to return to the previous screen; or
to return to the previous screen; or ![]() to return to the Main Menu.
to return to the Main Menu.
- Connect the charger clamps to the appropriate battery posts.
- At the Main Menu, tap Boost Charge. The Boost Charge screen is displayed.

3. Tap the box across from each displayed parameter and select the correct information from the displayed list.
NOTE: The Battery Type, Units, and Rating fields must be filled in before proceeding.
4. Tap Begin Boost Charge to begin the Boost Charge process.
The charger performs a series of tests to determine the overall condition of the battery before applying a boost charge to the battery. The charger WILL NOT boost charge a battery that has tested unsafe.
IMPORTANT: DO NOT crank the engine during the Boost Charge process.
5. Following a successful boost charge, the charger displays a CRANK ENGINE NOW message. The engine can now by cranked for up to 5 (five) seconds.

6. When the charger displays the Start Engine message, press Stop. A warning tone will sound every second until you press Stop.
Boost Charge Summary
The results of the Boost Charge session are displayed on the charger screen at the end of the session.
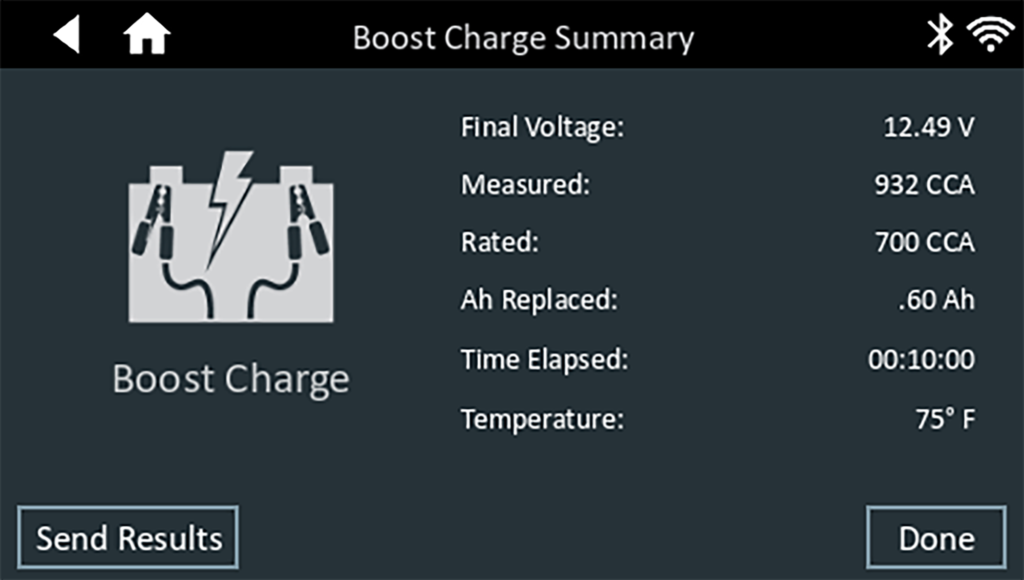
To print or send the test to a configured printer or via email, tap Send Results and select an option. Tap Done or ![]() to return to the Main Menu.
to return to the Main Menu.