
Use Manual Charge to charge a battery using user-selectable parameters including voltage, current, or time.
At any time during the test, tap ![]() to return to the previous screen; or
to return to the previous screen; or ![]() to return to the Main Menu.
to return to the Main Menu.
1. Connect the Diagnostic Device test clamps to the battery.
2. At the Main Menu, tap Manual Charge. The Acquire VIN screen is displayed.
3. Use the connected bar code scanner to scan the VIN bar code, usually located on the driver’s side door frame. The VIN can also be entered manually.
For best results, scan the barcode located on the driver’s side door frame. A two- tone beep indicates the scan was successful. A single beep indicates the barcode was not successfully scanned.
The VIN is also displayed behind the windshield on the driver’s side dashboard.
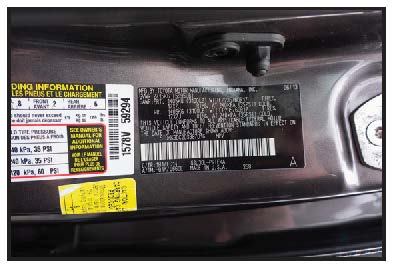
Driver’s Door Frame
NOTE: See the Recommended Scanning Procedure article for VIN scanning help and tips.
Manual Entry: Use the on-screen keypad to manually type the 17-digit VIN — the displayed digit counter will count up the alphanumeric characters as they are entered on the keypad. Tap NEXT.

4. Enter the battery information and power supply parameters.
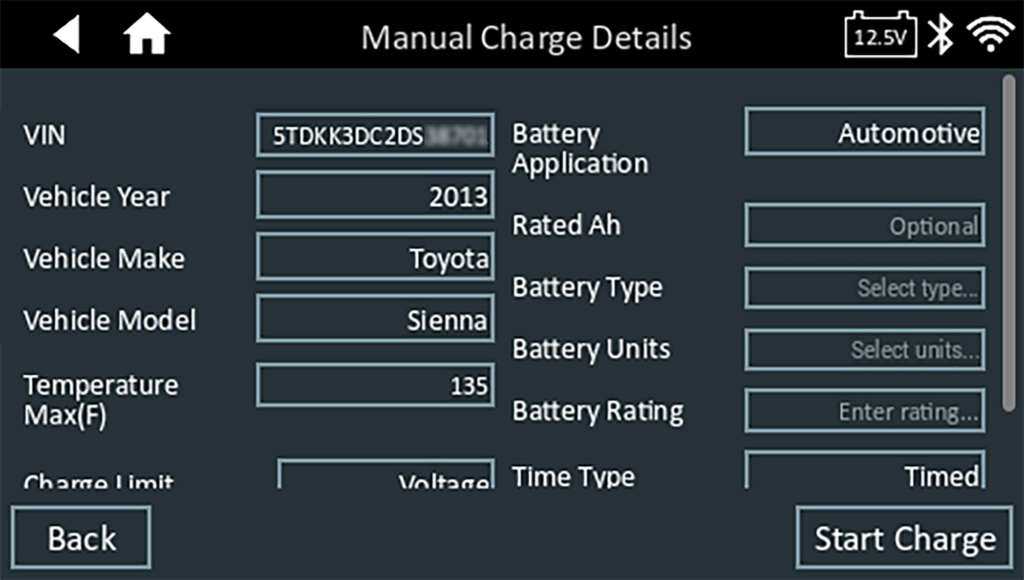
5.Tap the box across from each displayed parameter and select the correct information from the displayed list.
NOTE: See the Battery Information Definitions article for complete parameter definitions.
6. When the displayed information is correct, tap Next to begin the Battery Test.
NOTE: The Battery Type, Units, and Rating fields must be filled in before proceeding.
7. The results are then displayed on the charger screen.
Manual Charge Results
The test results are displayed on the charger screen.
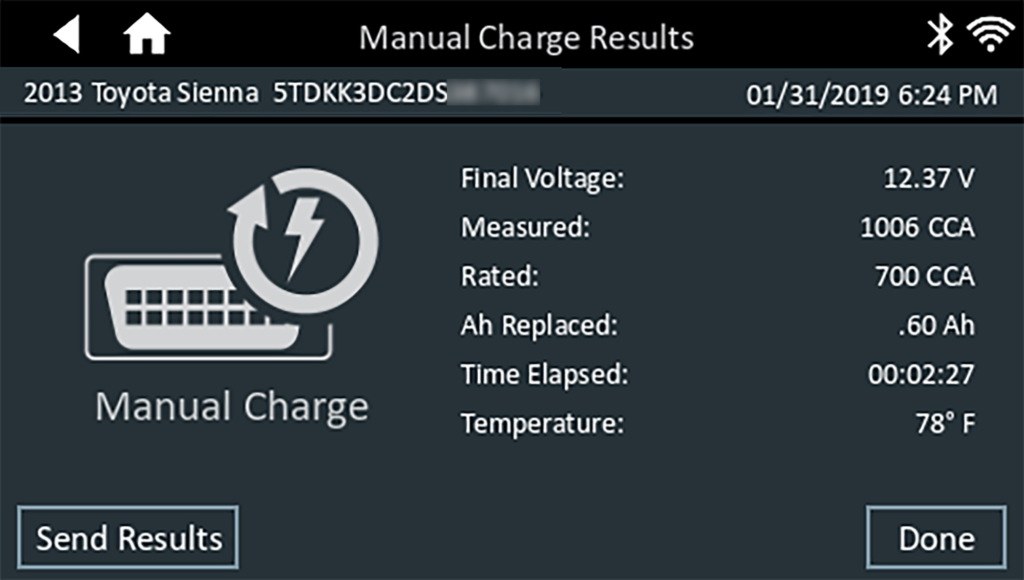
To send the test results to a configured printer or via email, tap Send Results and select an option. To return to the Home Screen, tap Done or ![]() to return to the Main Menu.
to return to the Main Menu.